Overview
ANB Go Business Mobile Deposit Introduction
ANB Go Business Mobile Deposit is a companion app for ANB Go Business. It’s designed for businesses with a high-volume of deposits, more users or accounts, or need consolidated reports for mobile (app-based) and remote (desktop) deposits. ANB Go Business Mobile Deposit includes the following features to promote a better mobile deposit experience:
– Make deposits with a certified mobile device.
– Log in to SmartPay Business to create reports on transactions submitted for deposit.
– From SmartPay Business, edit and void transactions.
This document highlights ways to use the features in ANB Go Business Mobile Deposit and includes a list of available reporting features.System Requirements
For an optimal experience, a high-speed Internet connection is recommended. The following components are required for working with the SmartPay Business Portal.
For Microsoft® Windows®:
– Windows 8.1: Microsoft Internet Explorer® 11 or Google Chrome™
– Windows 10: Microsoft Internet Explorer 11, Microsoft Edge®, or Google Chrome
– .NET® Framework 4.6 or higher
NOTE: The current version of Chrome and its two previous versions are supported.
ANB Go Business Mobile Deposit can be supported with the following mobile devices.
– Apple® iPhone®
– Apple iPad®
– Android™ phone
– Windows® 7 phone
– Android tablet
NOTE: The application does not support Apple® Boot Camp® or any virtualization software.User Terminology
Throughout this document, the text will refer to certain parties and their responsibilities in using the application. The following terms will help define “who is who” while performing tasks in the system.
1. Admin User – The admin user is responsible for creating, deleting, enabling, and disabling additional users within your organization. In addition, the admin user is responsible for the following:
– Editing, unlocking, and/or deleting a user’s profile.
– Resetting a user’s password to provide a temporary one.
– Assigning specific roles or functions to a user.
– Enabling access to deposit accounts for which a user will be processing deposits.
2. User – A merchant/member employee with the ability to support end users. Based on their assigned roles/privileges, users will have the ability to perform the following:
– Process transactions.
– Generate reports.
– Search transaction history.
– Edit transactions.
Note: Your menu options may differ slightly from those pictured throughout this document
Privileges & Roles
In order for a user to be able to utilize a supported mobile device, the organization’s administrator will need to assign the following privilege and role to a user’s profile within SmartPay Business.
Privilege – Customer Services
Role – Mobile RDC Application
Role Description – Allows users to access and use the mobile RDC application.Navigational Features
Accessing Mobile Deposit Enhanced
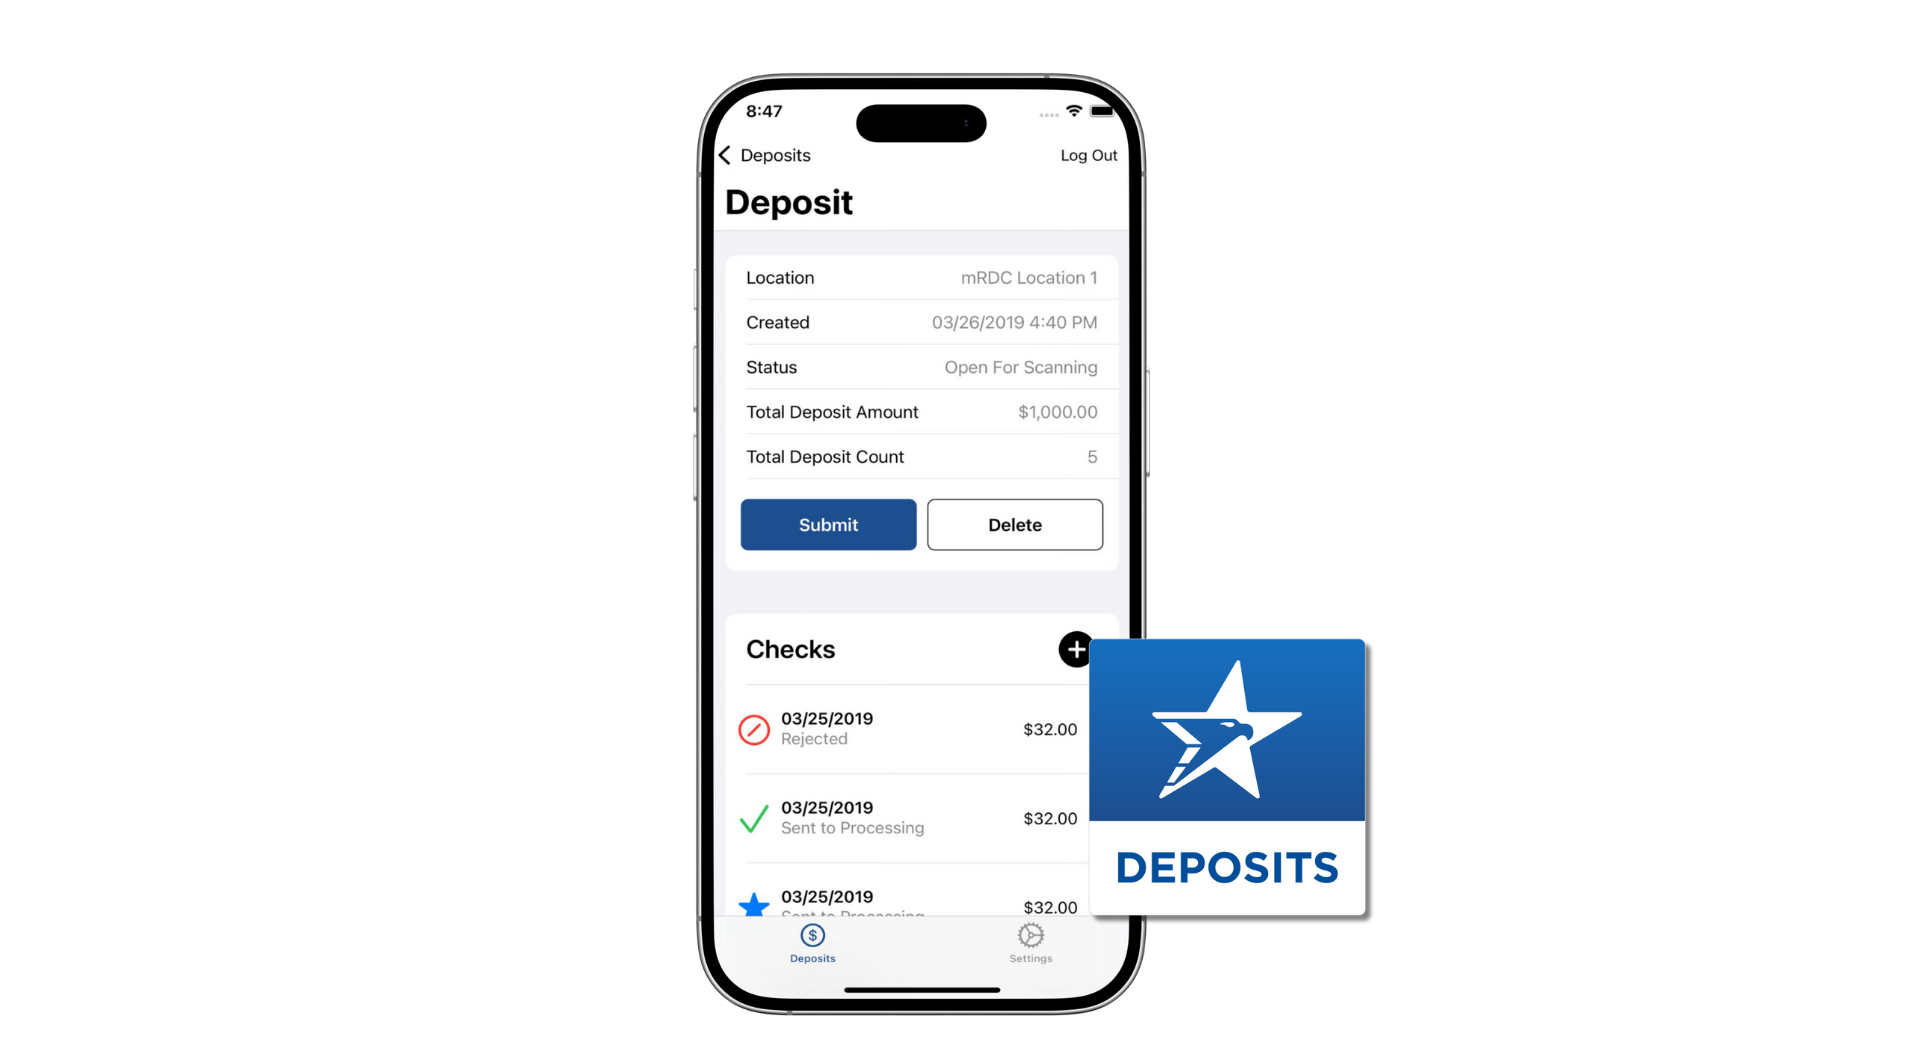
1. Mobile App: Once downloaded to a certified mobile device, the app allows you to create a new deposit with pictures of the front and back sides of checks.
2. SmartPay Business: Admins use this portal to set up users and assign them privileges and roles to perform tasks. Users access this portal to generate reports about customer/member deposits, edit transactions, and view transaction histories.
a. Log into ANB Go Business.
b. Select Other Services from the Main Menu Bar.
c. Click Remote Deposit Capture
d. The main menu on the left contains primary options such as Transactions or Reports that allow you to navigate throughout features in the system. Collapse this menu by selecting the vertical bar attached to the left main menu. Primary categories on the main menu contain sub-options based on user permissions. All sub-options under primary categories relate to that primary category. For example, all sub-options under the Admin tab relate to that topic.
Making Deposits
Creating a Deposit
1. Log into the ANB Go Business Mobile Deposits app.
NOTE: These credentials will be different from the ones utilized to access ANB Go Business from the web browser.
2. Login with your credentials (this is different from your online banking credentials)
3. Click on Create Deposit
4. Choose your location (if you have more than one) & Click Create Deposit
5. Click on Checks
6. Follow the prompts to complete your deposit:
a. Amount: Enter the amount of the deposit
b. Check Images: Snap a picture of the front & back of the check
Write “For Mobile Deposit Only” below the signature in the endorsement area on back of check. Failure to do this could cause the deposit to be rejected.
c. Customer Associated with check: Using your camera on your mobile device, take a picture of the front and back of the check. NOTE: Use the following guidelines to ensure your picture will be captured and read correctly.
– Sufficient lighting is available.
– All edges of the check are visible in the picture.
– Place the check in front of a contrasting, flat, and non-reflective background.
– Hold the device directly over the check while keeping it level and steady.
– Avoid blurry images.
d. Transaction Number: Enter transaction number (if necessary)
e. Deposit Check: to complete deposit
Deposit Status Summary
1. Log into ANB Go Business.
2. Select the Other Services from the Main Menu Bar
3. Click Remote Deposit Capture
4. Upon logging in to ANB Go Business, the Dashboard page appears with the Current Transaction Summary. This page shows the status of all transactions within the past 60 days.
NOTE: Clicking on any underlined status from the Current Transaction Summary will automatically generate a report for all transactions within the status for the current day.
The following table lists the potential status of any one transaction within the system.
Editing Deposits
Voiding a Deposit
1. From the Company Dashboard, click the Approved Deposits under Current Transaction Summary.
2. Click to view the deposit
3. Click on the Actions button at the top of the page.
4. Click Void
5. The system will ask you to confirm voiding the transaction. Select Void
6. Select Actions to enter a reason why the transaction was voided.
NOTE: The transaction will be voided and appear in a Voided status on the Current Transaction Summary page until it is resolved. Resolving a transaction means indicating a reason why the transaction was voided for communication and auditing purposes.
7. Enter a reason as to why the transaction is resolved. For example, the transaction was deposited in the wrong account.
8. Click Resolve.

9. This transaction will now appear under the Current Status as Resolved.
Editing a Transaction Amount
You may need to edit an amount if a transaction has had the wrong amount keyed in when the deposit was made. A transaction amount can only be edited when in the Approved status.
1. From the Company Dashboard, click the Approved Deposits under Current Transaction Summary.
NOTE: You can filter or sort the deposits with the control breadcrumbs at the top of the page. Locate the deposit you wish to void.
2. Click to View the Deposit
3. Select the Edit icon next to the transaction amount.
4. The Sale amount will become an editable field. Enter a new amount and a reason for changing the amount. Click the green checkmark icon to save the new amount.
Editing an Effective Date for a Transaction
Some checks may have specific instructions about depositing, including a specific effective date. Other checks may need an effective date pushed back if the deposit was made ahead of time. Use the following steps to change the effective date of a deposit item.
1.From the Company Dashboard, click the Approved Deposits under Current Transaction Summary.
NOTE: You can filter or sort the deposits with the control breadcrumbs at the top of the page. Locate the deposit you wish to void.
2. Click to View the Deposit
3. Select the View link to the left of the transaction you wish to change.
4. Select the Edit icon next to the Effective Date field
4. The Effective Date field will become an editable field. A calendar option appears for date selection, or you may type a date in MM/DD/YYYY format. Enter a new date and the reason for changing the effective date. Select the green checkmark icon to save the new date.
Reports
Commonalities Among Reports
– Reports are generated in Central Time (CT).
– Print is an option available for all reports.
– Exporting reports into a Microsoft® Office Excel® spreadsheet, a tab-delimited file (.TSV) or a comma delimited file (.CSV) is available.
– Select Full Screen to view your report across your entire monitor screen.
– Select Filter to view filters where you can search the report for alphanumeric entries. Deselecting will hide filter fields and strip the report of your alphanumeric search.
– Select Filter Columns to bring a list of all the information columns available in the report. You may configure the list to have certain columns appear in the order you choose, or to hide columns from the report listing.
a. Use the View option to determine whether an informational column appears.
b. Use the Prioritize tools to change the order of a column in the report.
c. Use the Freeze tool to lock a column in place when viewing the report.
NOTE: Report filter settings can be saved into a template for later use. However, it is recommended that you save the reports themselves by exporting them to a file saved on your computer.Reporting Privileges and Roles
The administrator user within your organization will need to assign the (full) Accounting role under the Customer Services privilege for any users within your organization that will be working with the reporting functionality.
Reports include new features for customizing the information displayed in each report.Deposit Results Report
The Deposit Results report is a date range report used to display a list of batches created. It can be used to monitor the status of current day batches and the items in them, or to look at previous days’ batches and items.
1. Log in to the application, and then select Reports.
2. Select Deposit Results.
3. The Deposit Results Search page appears. Select a Location ID from where to pull the report information. Select a date range using either the Quick Pick option with a list of pre-set date ranges, or use the custom option by entering a Start Date and Start Time options and the End Date and End Time options. You can search for report results older than two years (up to seven years), as long as you enter a date range in which the start and end dates are both older than two years.
4. Select Get Deposits. A list of the batches matching your criteria appears. You may need to scroll to the right to view all of the information for the report.
The following table describes all the fields, in alphabetical order, displayed in the Deposit Results report and their definitions.
Notice that the report also displays the status of each transaction under the column Deposit Status. The following table describes all the statuses that a transaction can display.
5. Select Deposit Details to view the events the batch has been through. The details appear on the Deposit Details page. Navigate back to return to the report results.
6. From the Deposit Results page, select Item Details to view the individual transactions within the deposit. Results will appear on the Item Details page. Items that need to be re-scanned or that have been rejected will be in red.
A transaction’s status indicates where the transaction is in the deposit process. The following table describes all the potential statuses that an item can be in.
7. Select View under Item Details to view the Batch Item Details page, which has information about the item in relation to the batch.
8. Select Check Image to see specific item detail information (see figure below)
9. On the Batch Item Details page, select Show Event History to see the automated steps/processes the transactions have been through.Standard Report
Standard reports are pre-defined daily reports.
1. Log in and select the Reports tab from the left main menu.
2. Under the Standard Reports section, select the report you wish to run from the list displayed.

3. Once you select a report, it will run automatically with pre-set criteria in the report filters.
a. To make a temporary change to the report criteria:
– Adjust any filters, as needed.
– Select Run Report.
b. To make a permanent change (saving the report template):
– Adjust any filters, as needed.
– Adjust the name of the report and then select Save to My Reports.
Invoice Reconciliation Report
This report helps customers reconcile billing invoices with their transactions. It’s located under the Standard Reports section of the Reports page.
To access the Invoice Reconciliation Report:
1. From the Dashboard, choose the Reports tab.
2. Select the Invoice Reconciliation link under Standard Reports. The date criteria screen appears.
3. Select the month and year. The current or future month will not be available for selection. Only past months starting from March 2017 will be available for selection.
4. Click Run Report. An example of the report appears below.
The report can be filtered, printed, and exported. As shown in the following image, you may use filters in the Event Type drop-down menu to tie specific types of transactions to line items on invoices, such as Unauthorized or Returned NSF, for example.Using the Report Builder
The report builder utility can be used to create one-time queries and custom recurring daily, weekly, and monthly reports for bookkeeping, historical research, and problem solving.
There are two options when creating a customized report: New Report and New Shared Report. While both are customizable, the shared report is available to other users who have access to the system. Other users will be able to pull the shared report and use its settings to generate information. Only the user who created the shared report can delete it.
1. Log in to the application, and then select Reports from the left main menu.
2. To create a report, click New Report. If others need access, choose New Shared Report instead.
3. The Reports page appears. In the top bar, enter a Title for the report.
4. Fill in the report criteria in each of the four sections: Report Type, Date Range, Advanced, and Report Layout headers.
5. Report Type Section– Designate if your report will be a Transaction Report based upon the current status of a transaction, or a Historical Event Report based upon past events a transaction has been through in the system.
6. Date Range Section– In the Date Type field, select either Transactions Created or Effective Dates for the report, which will determine if the report displays transactions based upon the date, they were created versus the date they took effect. Select a pre-specified date range using the Export Date Range option (ideal for recurring reports) or specify your own date range with the Start Date and Start Time and the End Date and End Time fields.
7. Advanced section – Specify the Location and Status of the transaction you wish to have in your report.
– Settlement Status: Know whether a transaction has been deposited. Designate a single status or multiple statuses by selecting the appropriate check box(es).
– Origin of Transaction: Determines how the transaction was received and will be coded. You may designate a single origin for the report or multiple origins by selecting the check box next to each option.
– Originated As: Specifies how the transaction will be processed. You may designate a single type or multiple types.
– Account Type: Determines the type of transaction the report will display. You can select a specific account type or select ALL.
– Operation: This option specifies what process a transaction has been through. You may designate one process or select ALL.
– Authority Response Code: This option represents the types of return responses that can be received for a transaction. Select a specific response code or select ALL.
– Amount Range: The From and To options allow you to look for transactions with a specific amount or between amount values in decimal format (XX.XX).
8. Report Column Headers section – This section allows you to organize how the report appears.
– Select the View check box next to any fields to have them show on the report.
– Under Prioritize, use the arrows to change the order in which information appears. For example, select the upward arrow to have a field listed before others, or the select the downward arrow to have other fields listed before it.
– Use Freeze to lock fields when viewing a report. This will hold certain fields in view while you explore the rest of the report’s information.
9. At this time, you may choose to select the Share to All Users check box (as shown below) if you want to have this report available for other users to view. If you selected New Shared Report previously, this box will already be selected. Alternatively, you may wish to save the report for your own use at a later time by selecting Save to My Reports. This option will both save the report and generate a report to view.
10. The report displays results.
11. Use the filters to change the report and then select Run Reports again, or you can print/export the report, as needed.
12. Select View to the left of an item to view more details about the transaction.
13. To change the report template, adjust the report filters as desired, and then select Save to My Reports. This saves the filter options as a template for later use.
NOTE: Be sure to select the Share to All Users check box if you wish to save the report for others to use.
Client Setup & Administration
Overview
With the SmartPay Business platform, administrators create and maintain user profiles for employees within the organization, and grants privileges and roles allowing users to perform tasks in the system.
An admin performs the following:
– Setting up employee user profiles in ANB Go Business and the SmartPay platforms
– Enabling or disabling users
– Editing user profiles
– Unlocking user profiles
– Deleting user profiles
– Resetting passwords and providing new temporary passwords for users accessing the site through the URL directly and not online banking
– Assigning specific roles or functions
– Enabling access to any and all accounts (locations) for employees to process
Based on roles assigned by an admin, users process desktop deposits, generate reports, research historical transactions, and edit transactions.Adding a New User
Administrators create users who will deposit checks, pull reports, or other tasks within the system on a daily basis. The admin can also update a user’s profile, unlock a user’s profile, and delete a user’s profile as needed.
1. Click on the Administration tab within ANB Go Business.
2. If you have the Manage User Roles tile, click on Manage User Roles. If not, click on Manage Users.
3. If you clicked Manage User Roles, follow the steps below. If not, proceed to the next step.
a. Locate the User role you would like to grant Positive Pay permissions to.
b. Click the icon.
icon.
c. Click on the Features tab.
d. Within the Search box, type Deposit.
e. Toggle on the Enable Mobile Deposit and Enable Remote Deposit SSO features.
f. Click Save.
4. If you clicked Manage Users, follow the steps below. If not, proceed to the next step.
a. Locate the user you would like to grant Positive Pay permissions to.
b. Click the icon.
c. Click Assign Rights
d. Click on the Features tab.
e. Within the Search box, type Deposit.
f. Toggle onthe Enable Mobile Deposit and Enabled Remote Deposit SSO features.
g. Click Save.
5. Follow the steps below to add the user directly into the Remote Deposit Now application.
6. Within ANB Go Business, Click on the Other Services
7. Click the Remote Deposit Capture tile
8. Select Admin | Users from the left main menu.
9. From the left navigational bar, under the User Admin heading, select Add User.
10. Fill out the Add User Settings and the Privileges for the user
a. Full Name: First & Last Name
b. User Name: Login ID
c. RDN ID: Login ID
d. Email Address
11. After you select privileges for this user, click Add.
12. The system creates the user and allows you to select roles underneath each of the privileges assigned to them.
a. Select roles for this user.
– Accounting – Gives user all reporting functionality
– RTG User / SERVER ONLY: Don’t select
– Remote Deposit Now: If enabled, it gives access to Desktop Remote Deposit
– Reconciliation Report: Allows user to view the Reconciliation Report
– Customer Data Privacy: Allows the user to view the page and generate reports. All users should get this.
– mRDC: Gives user access to log into mRDC. All mRDC users should get this
– Credits & Debits PDF Report: Allows user to view/download the debits& credits PDF report. Users with access to RDN should get this
a. Select the locations for this user (accounts).
b. Select Update to finish assigning privileges and roles for this user
NOTE: A temporary password is displayed at the bottom of the page. Provide this password to the created user along with their user ID (login ID)
Enabling RDN Features for a User Profile
To specify the permissions if this user will have with RDN, select the check box next to the Enable RDN option on the Update User Settings section.
1. Select which permissions the user will need from the options displayed.
– Admin Permission – Separate from the account administrator role. This role is required to access the Tools tab, which allows the user to delete an existing batch.
– Receive Alert Emails – Allows the user to receive deposit alert emails upon deposit.
– Scan Items – Allows the user to scan items through RDN.
– View Deposits – Allows the user to view deposits in RDN.
– Export Deposits – Allows the user to export items.
– Receive Activation Emails – Not applicable, do not check this box.
– Create Deposits – Check this box to allow the user to make deposits to EPS.
– Edit Items – Check this box to allow the user to be able to modify/fix batches.
– Search – This allows the user to be able to perform searches on the Search page.
– View Notifications – This allows the user to view any deposit messages coming from EPS, such as exceeded transaction limits.
2. Make any other changes to this profile and select Update at the bottom of the page to finish and save changes.
NOTE: If you wish to add more users at this time, select List Users from the left navigational bar before selecting the Add Users option, again. This step will need to be taken for each new profile you create.Unlocking a User in SmartPay Business
The system locks out users who key a password incorrectly at least five times or fail to answer the secret question correctly when requesting a temporary password.
As the Admin, you are responsible for unlocking FI user profiles to allow access to the system again. If the Admin user is locked out, contact your first line of support for assistance. To unlock a user:
1. Log in to the system.
2. Select Admin | Users from the left main menu.
3. Under the Locked column, select the Unlock option for that user. The Unlock text disappears, and the user profile unlocks.
NOTE: If the user needs a new password, reset the password following the steps in the Resetting a Password section.
Deleting a User’s Profile
Deleting a user profile will remove it from the list of users and make it inaccessible. The user name for that profile cannot be utilized again for a different user. The profile will be categorized as a deleted user.
NOTE: To delete an admin user, you must first remove the Administrator role from that admin user’s profile before completing the following steps.
1. Log in to the system and select Admin, then Users from the left main menu.
2. Select Edit for the user profile to delete.
3. Select Delete User
4. A prompt will ask you to confirm deleting a user. Select Yes to continue.
Resetting Password
Admins can reset passwords for mobile deposit users directly through the SmartPay site if a password reset is required
1. Log in to the system and select Admin, then Users from the left main menu.
2. Select Edit for the user profile that needs a password reset
3. Select Reset Password
4. A temporary password is provided with an option to Copy Password or Copy Password Reset LinkUser Session Timeout
The system automatically logs off users who are inactive for at least 15 minutes. You receive two-minute Session Timeout Warnings. Click anywhere on the screen to remain logged in.