
There are two ways to process exceptions – from ANB Go Business or the full Positive Pay site.
- Select Other Services and then Positive Pay.
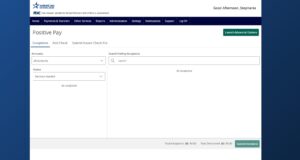
- On the Exceptions tab, select the desired account from the drop-down menu. By default, exceptions related to all accounts will be listed.
- Click the desired check or ACH item under Decisions Needed.
- If a transaction should be paid, select Pay and review the details on the screen.
- If a transaction should be returned, select Return and select the corresponding reason from the drop-down menu.
- Once done, click the Submit All Decisions.
- Alternatively, you could click Launch Advanced Options to visit the full Positive Pay site.
- Select the Exception Processing then Quick Exception Processing.
- Select the Client ID to process exceptions for within the All Client IDs drop-down menu. Only Client IDs with available exceptions to process are available.
- Select a transaction listed in the Decisions Needed category.
- Clicking the exception will bring up the details. If the item is a check, you will see an image of the check.
- If a transaction should be paid, select Pay and review the details on the screen. Once done, select Save.
- If a transaction should be returned, select Return and select the corresponding reason from the drop-down menu.
- To view a listing of transactions already decisioned, click the carrot icon next to the Decisioned section. Click on any transaction listed to view additional details.
- To add an ACH authorization rule, select an ACH transaction. To prevent recurring ACH items from generating exceptions you can create rule to allow them to automatically process.
- Click Add Rule. This option will only appear if the user is entitled based on security rights.
- When the ACH Add Rule is selected, Company ID field will be prepopulated based on the presenting ACH item.
- Description: Enter a name for the rule.
- SEC Code: Selecting All SEC Codes is recommended.
- Debits or Credits: Leave as Debits, credits will not be blocked.
- Max Allowable Amount: Enter a maximum amount or leave blank for no maximum.
- Click Save rule when done.
- Note: you will still need to select to pay the item even if you choose to add a rule.
- A total dollar amount of transactions waiting for a decision and those already decisioned is listed on the screen.
- You can see today’s decisions under the Decisioned section. The icon to the left will indicate each decision. A $ icon indicates to pay the item. An arrow icon indicates to return the item.
- You can also choose to Pay All or Return All exceptions by selecting the three vertical dots next to either the Decisions Needed category (to decision all exceptions) or next to the Individual Exception Type categories (to decision all exceptions of that type).
- Note: we highly recommend you review all exceptions before choosing an option to pay or return All.
- Note: we highly recommend you review all exceptions before choosing an option to pay or return All.
Additional resources
-
ACH and Check Positive Pay User Guide
Read moreView the user guide for ACH & Check Positive Pay.
-

Positive Pay – Submit Issued Check File
Read moreUse the Submit Issued Check File page to upload issued check files to American National Bank.
-
Positive Pay – Check Search
Read moreFollow these instructions to search for a check in Positive Pay.
-
Positive Pay – Add New Issued Check
Read moreUse the Add New Issued Check page if a check was manually written or was otherwise not included in the electronic issued check file that was submitted to American National Bank.
-
Positive Pay
Read morePositive Pay is an online fraud prevention tool that gives you the ability to view checks and ACH transactions before they clear.